Deep Dive: 14 Day John Muir Trail Gear List
- Greg Marshall
- Jun 12, 2022
- 23 min read
Updated: Jun 14, 2022
A deep dive into what items I took on my 14 day JMT thru-hike, and why those items made the list over all other options.

Choosing backpacking gear is a big undertaking influenced by weight, volume, budgeting, individual goals, and individual style preferences. It is a topic in itself, which is why this article is dedicated completely to discussing the items and decision-making for our 14-day JMT attempt. In addition to the lifelong outdoor recreation experience Shae and I had before this effort, I also spent two and a half years professionally in outdoor retail. My primary goal over those 2.5 years was to get deep in the weeds of what gear options existed and the sort of decision-making that led experts to choose one option over another.
Series Map
Part 3: Meal Planning
Part 4: Gear List Deep Dive (you are here)
Part 5: Hiking the JMT in 14 Days
The Investment of Backpacking Gear

Your budget is maybe the best place to start when planning backpacking gear. There are a lot of things you need which add up in cost, and there is a huge spectrum of quality and price options for every one of those. Backpacking tents, for example, can cost anywhere from about $300 to more than $1,500. I have always set a budget for individual pieces of gear, rather than setting one, all-gear-included budget. That said, I believe that a new backpacker starting with nothing will need to invest at least $1000 in gear for the John Muir Trail. Expenses like a pack, tent, sleeping bag, water filtration system, and a satellite phone for emergencies add up fast.
Pack Weight
The primary consideration, in most backpacking gear choices, will be a reduction of weight for an increase in price. Construction quality plays a smaller role in gear pricing as well (I would never choose the store-brand, budget backpack for a trip like the JMT unless there was no other way of affording the trip).
My strong opinion is that in the case of most major backpacking gear (tent, pack, clothing, sleeping bag, etc.) there’s a point where increases in price provide diminishing returns in the product. Most of us are not willing to increase our tent budget by another $300 to save one ounce of pack weight, but that might be required for the lightest tents on the market. I also wouldn’t personally spend $250 on a 5lb tent when I could spend $400 on a tent half that weight.
Below is a good guideline for weighing decisions on the most important gear you’ll take on the trail. For simplicity, I propose that there are three options for your main gear purchases. There are “get-out-the-door” options which will be cheap, far from the lightest or highest quality option, but they will serve their essential function assuming they hold up. At the other end of the weight distribution is Super Ultralight gear (I’ve also seen this category referred to as “crazylight”). The lightest, highest quality, most expensive and innovative technology that you can buy. The mark for what that is moves every year to higher prices and lighter materials.
In the middle is what I consider the sweet spot; this gear is usually categorized as “backpacking” or at the lighter, more expensive end “ultralight”. It’s generally pretty bomb-proof gear and is probably only about half the cost of the Super Ultralight alternative, but only a few ounces heavier. Oftentimes, these options were the newest and most expensive technology 3-5 years ago, and prices have gone down as product and materials technology advances.

Pack weight isn’t something you decide directly. It is a culmination of the many gear choices you make as you build up your gear list. At some stage, you might decide there are things you’re just willing to leave at home in the name of saving weight on your back. Emergency equipment like cold weather gear, first aid materials, and emergency communication devices are not the items to cut here. I’ve seen backpackers pass on a stove, sleeping pad, tent, extra clothes, camp shoes, and even a water filtration system (too risky for me).
An excellent tool for figuring out how it all fits together from a weight perspective is called Lighterpack.com: https://lighterpack.com/

There is a lot of content here. Use the links in the condensed gear list below to skip to your topic of interest. With that, here is the condensed version of my complete JMT gear list (you can find a detailed explanation of the decision-making on these items farther down):
Sleep
Cooking/ Hydration
MSR 1.3L Pot
Spork
16oz Fuel canister
Bic Butane lighters
Clothes
Buff
Safety
iPhone
Face mask for COVID and/or smoky conditions
Guthook Guides Mobile App with JMT download (app has since been rebranded as FarOut)
Compass
Accessories
Spare AAA batteries
DEET 100 Bug spray
Bug headnet
TP supply
Hand sanitizer
Toothbrush
Travel size toothpaste
Charging cords
Pack cover
Extra Ziploc bags
Sunglasses
Total Base Weight (no food/water): 22.2lb
All-in: 43.2lb
Sleep
Big Agnes Fly Creek mtnGLO 2 person tent (header image) - 2lb 6 oz, $440
The Fly Creek 2 is a true ultralight tent, and it is awesome. There are lighter tents out there, but not many. The price tag is steep and this tent was actually a gift, but having used it and other lower quality tents, I believe it is worth it. If I ever need to replace it, I’m ready to pay somewhere in the $400-500 range to get a good one.
The Fly Creek is small for its two-person designation, but that’s a universal truth among ultralight tents. It was tight quarters for the two of us even with Shae being a smaller than average human. The mtnGLO option on this tent– in-seam lights– was a nice-to-have but not mandatory. They add marginal weight and were convenient, and we never needed to replace the 3 AAAs in the two weeks we were using it.
In general, tents are an area I’d recommend opening up the budget a little bit, because a cheap tent can be heavy, bulky, and a total pain to set up and tear down. That was the case with the six pound monster Jack and I took on the AT. You can save a lot of weight and volume for a reasonable amount of extra spend on tents. You’re also relying on it as your shelter for days to weeks at a time, so durability is important. Like packs, I wouldn’t go for the store brand here. There are a lot of high quality manufacturers of tents and many different tents styles, so do some research. You can get light tents that use no poles, use your trekking poles, or include their own poles. Bivys and hammocks are also good options depending on the trail (I wouldn’t go with a hammock on the JMT in case you need to camp above treeline). Big Agnes, Nemo, Gossamer Gear, ZPacks, and Tarptent are among the best. The North Face and Marmot are a tier down in quality and price.
Big Agnes Torchlight 20 Sleeping bag - 2lb 11oz, $320
This was an upgrade from the Marmot bag I used on the AT. It’s a reasonably light sleeping bag, extremely packable, and utilizes the most innovative insulating technology available on the market. For those reasons, it’s also on the expensive side for a 20℉ sleeping bag. Overall, and somewhat ironically, I have to give it a lukewarm review.
Sleeping bag temperature ratings are notoriously optimistic. It’s well known that you should never expect to sleep comfortably if the air temperature reaches the labeled value (in this case 20℉). Yet, I was still disappointed in the insulation of this bag. There were only two nights on the JMT where I believe we were approaching the 20s, and most nights were in the high 30s to mid 40s where we slept (below treeline).

I still was cold at night, and had to make up the extra insulation by wearing almost all of my warm layers to bed every night. Even accounting for Big Agnes’s fine print (shown on the right) regarding base layers and a hat, their temperature claims didn’t hold up. Thankfully, I had enough extra warm layers to still sleep reasonably well most nights. One final feature of mention is that Big Agnes markets the Torchlight as an innovative bag for its expandable design, such that it can be used as either a mummy or almost-rectangular bag. Given the need for insulation, I never unzipped it from mummy bag mode.
A few notes for making your own sleeping bag determination:
Mummy will always be lighter to carry and warmer for the weight than a rectangle bag. For this reason mummy bags are almost universally used among backpackers.
Bag insulation comes in three varieties: synthetic, down, and water-resistant down.
Synthetic is cheaper, heavier, bulkier, and can be warm even if wet.
Down (goose or duck feather) is incredibly light and warm when dry, but gets wet easily and the warmth of it is significantly hindered by moisture
Water-resistant down (such as DownTek™) is at the bleeding edge of bag insulation technology as manufacturers push for the lightness of down and the water-reliability of synthetic bag fills. This tech is advancing quickly over the last few years but there is still lots of room for improvement.
Do your research on how the advertised temperature rating was determined, and see if real people agree with the rating in their reviews.
Thermarest ZLite SOL foam sleeping pad - 14oz, $40
I spent a lot of time considering my sleeping pad options for this trip. On the AT, I didn’t take one at all and knew it was worth the investment and weight this time around. I went with the foam option because in my mind nothing could beat the combined weight, durability, packability, and price. There was no risk of puncture like many very ultralight inflatable options. I could store it on the exterior of my pack, saving internal pack volume for better things. Most inflatable options will cost you a minimum of 2.5 times what this one cost, and to me the lack of confidence in durability makes that price jump unwarranted. Furthermore, inflatable pads will only save you a couple of ounces over the foam.
All the positives as they are, this was not comfortable to sleep on at all. This is probably the value inflatable options provide, but the reviews online don’t even make inflatable options sound comfortable. The standard for your sleeping pad should be low, as the main benefit is insulation from the ground; warmth, not padding. The degree of insulation you’re getting will be denoted as the R-Value. Market leaders in sleeping pads are Thermarest, Big Agnes, Sea to Summit. Store brands might serve your purposes here at a lower price point, but likely will be a heavier pad.
Trekology Inflatable pillow
Nothing special but a cheap inflatable pillow adds some comfort at night. Could been cut to save a couple of ounces if needed.
Cooking/ Hydration
Sawyer Squeeze water filter - 2.5oz, $39
The Sawyer Squeeze is basically fantastic on price, weight, and reliability. Seriously, I couldn’t ask for a lighter or more packable water filter at any price point, much less forty dollars. Sawyer offers a smaller model called the Mini as well which I own. It might be enough to filter for one person, but we went with the higher flow rate of the Squeeze since there were two of us.

The main issue with the Sawyer filters is that you filter water from a special filter bag which can be a pain to get full of water. Small waterfalls or rivers with significant current were ideal, deep lakes worked okay, and shallow standing water would work only if you are desperate. The Squeeze filters at a moderate rate (quoted 1.7L/min, but more like 0.75L/min by my experience). The flow rate of the filter did slow down noticeably after about three days, and might need to be backflushed more regularly than advertised for the fastest filtering.
The Squeeze is in the category of active filters- filters which require human power to filter the water. There are passive filter options available as well which don’t require direct intent to filter water, which can free up your time and efforts for other tasks like setting camp. Having used the Platypus GravityWorks on the AT- a passive, gravity filter- I strongly preferred the control and efficiency of the active filter. The Squeeze also meant we never needed to commit a water bottle to dirty, untreated water. If it was in a bottle, we knew it was filtered and safe to drink.
Other filters worth consideration are from Lifestraw, MSR, and Katadyn. Aquamira Water Treatment Drops can also be used in place of a filter.
MSR Pocket Rocket - 2.6 oz, $38

The PocketRocket is an unbeatable lightweight and compact stove for all but the most crazylight packers. The quoted boil time is 3.5 minutes for a liter of water, which I believe is only slightly optimistic. It’s reasonably fuel efficient, and the burner platform is pretty stable for its size (would not work well for pots or pans greater than about 10 inches in diameter). It always lit with ease, which is a big plus compared to other backpacking stoves I have used.
The PocketRocket doesn’t include a wind baffle to stand around it while cooking, but protecting the burner from wind makes a massive difference in the performance of this stove. I knew the value of this from the wind baffle that comes with the MSR Whisperlite International, which Jack and I used on the AT. For the JMT, I used about 5 feet of standard aluminum foil, then folded it over on itself several times for structural stiffness and to get the height to what I wanted it to be. I set this in a circle around the stove whenever it was on, and it folded down to roughly a 3”x4” rectangle when we were storing in. Since aluminum foil has questionable durability, I packed a replacement baffle in one resupply at Muir Trail Ranch.
As I already alluded to, the Pocket Rocket is leaps and bounds ahead of the Whisperlite I used on the AT. Cheaper, lighter, and easier to use. The Whisperlite probably only makes sense if you are cooking for a group of 3 or more. Jetboil makes really competitive stoves to the PocketRocket– to me they’re totally equivalent options. JetBoil sells stove/cookpot packages as well, but these cost a little more than just getting the MSR stove and pot separately.
Bear Vault 500 bear canister - 2lb 9oz, $80
I chose the Bear Vault based on the weight to price ratio. REI was having a sale, which was really what pushed me to pull the trigger. There were no issues with durability and not any design issues to really complain about. Overall, after two weeks of hiking with it I’m convinced that Bear Vault was the best option for me. The BV500 has 700 cubic inches, or 11.5 liters, of storage capacity. This proved to be small for 7 days of food, even with low daily calorie goals like I discussed in Part 3 of JMT Series. Unfortunately I felt that any larger and the bulkiness of the canister would be too inconvenient to justify the increased volume. The transparent polycarbonate wall was a big help because you could see where certain food items were.

Bear canisters are, by design, inconvenient. They are heavy, bulky, rigid, and hard to open (as these are the qualities which deter a bear from a potential midnight buffet). Aside from Bear Vault, the two other major competitors I am aware of are Backpacker’s Cache and Bearikade. I’ve used a Backpacker’s Cache before and it is inferior to the BV in every way. Heavy, less storage capacity, harder to open, and you can’t see into the side like with BV’s transparent material. Bearikade is the closest thing to a market leader. Bearikade’s closest size competitor to the BV500 is The Blazer, which weighs in at 2lb 1oz, but will set you back $360 (4x the cost of the BV500). I find that price point egregious, and you still lose the transparent wall material of the Bear Vault.
2x 1L Smartwater water bottles

The idea to reuse Smartwater bottles for a backpacking trip was stolen from visionary backpackers that came before me. These bottles are lighter than a real Nalgene or the likes, but also much more durable than your average Poland Springs water bottle. They were easy for a partner to reach in the pack, easy to drink from, and easy to cook with. Filtering into them was less convenient because they have a small cap compared to other bottles. Two weeks is the longest I would push any single Smartwater bottle before replacing it. They worked very well for this trip but were starting to show their age and lose some structural integrity.
Having used a bladder/dromedary/reservoir on the AT and bottles for the JMT, I’m strongly in favor of bottles. Reservoirs are a viable alternative that usually fit easily into your pack and don’t require fishing out a bottle whenever you need a drink of water. However, bladders are harder to use for cooking water, more likely to puncture, and I liked not needing to drink out of a hose. You can drink water faster from a bottle and thus I believe it is easier to keep up on hydration.
MSR Trail Lite 1.3L Pot - 7.1oz, $26
This lightweight aluminum pot was always enough capacity to boil water for two people, unless we were making mac & cheese for dinner. It was also a great size for storing the stove and stove windshield inside. More ultralight options exist made of titanium, but that will cost substantially more for small weight savings over aluminum.
Spork
We went with plastic ones and had no durability issues, but could also get aluminum or titanium if you want light but more durability. Titanium will always cost a premium though.
16oz Fuel canister
Carried a lot of fuel at the start because we were going 7 days with two people.
We had fuel left so maybe more than we needed. Traded for 8oz canister at Muir Trail Ranch.
One benefit of the 16oz can was it’s taller, which tended to make cooking a little bit easier.
Bic Butane lighters
Always at least on backup. Primary purpose is lighting the stove, but can be used to fuse rope among other things in a pinch.
Clothes - all clothes kept in a plastic bag if not drying or worn
Topo Athletic Ultraventure Pro - 10.4oz, $150

I have weird feet; at a glance I have been accused of having a 6th toe. I’ll run in
Altra, Topo Athletic, and occasionally New Balance shoes because they offer the widest toe boxes in athlete footwear. My feet aside, the Altra Lone Peak is one of the most popular thru-hiking shoes and a great place to start if you don’t know what is right for you. From years of running and working in running retail, I knew what shoes I’d be considering the minute I knew I was thru-hiking the JMT.
This shoe has the same last as the Topo Athletic Ultraventure (which I had been doing my long trail runs in before the JMT), but includes a rock plate and the Vibram outsole has a slightly deeper lug than the Ultraventure. Those features add a little weight, but this is well below average weight for a backpacking shoe. This is also a low-top shoe rather than a mid-height hiking boot. There’s no material above the ankle. Some people might miss the extra ankle support of a mid-height boot, but coming from a running background I really lean towards light and nimble shoes over hefty, rigid boots. In general there has been a shift towards these lighter, more flexible shoes in backpacking over the last five to ten years.
Shoe Fitting Advice for the First-Time Backpacker
Err on the side of larger rather than smaller because your feet swell throughout the day. They need to fit, but generally most of us fit reasonably well in a shoe and also in the half size up or down from that. Always choose the larger size. Every morning, I’d find my shoes to be a little loose on my feet compared to how they felt when I took them off the night before. That’s okay when the shoe is the right size as it will accommodate daily foot swelling really well, so long as you don’t experience excessive sliding or rubbing.
There might not be anything worse than poor fitting footwear in backpacking. I suffered to an incredible extent from this on the Appalachian Trail, and Shae would suffer in the same way on JMT because of difficulties finding shoes in her size. Test them extensively before you commit to weeks in them on your trip.
There is nothing that I could do to make this shoe better for my feet than it already did. It was perfect. It might not be the perfect shoe for you, but make sure that you do find the perfect shoe for you before you go. Hundreds of miles will turn the smallest of pressure points into a painful disaster.
Birkenstock-like Camp Shoe
Go for the lightest option available. Birkenstock are cork which can be okay but generally not as light as you might think. Oofos or similar recovery slides are all foam and very, very light. Even cheap flipflops from target would suffice because the most important thing is to let your feet recover as soon as you set camp. Walking around camp to set up the tent, filter water, cook dinner, stow the bear can, can all be done in these open-toed shoes and help your feet be in good shape for tomorrow. It will reduce your chances of foot issues to begin with and is even more critical if you do develop foot issues. Time in these is an opportunity for hotspots and blisters to dry, and to unwrap or rebandage feet if necessary. They double as a good swimming shoe in lakes with a rocky bottom.
Ankle Gaiters - 1.3 oz, $25
We used Altra Trail Gaiters. I would not recommend these because of their mechanism for securing to your shoe. They rely on cheap velcro to secure them on the back of the foot. The velcro pad has a weak adhesive- like a sticker- to hold it to the shoe, and these detach from the shoe almost immediately. The only way we were able to use them as intended was that Shae had brought extra velcro material, and we’d replace the shoe velcro piece every couple of days.
Gaiters are invaluable at keeping debris out of your shoes and for negligible weight. Rocks and twigs in the shoe open the door for blisters even with well fitting footwear, and stopping to clean your shoes out is a pain when it means taking a backpack on and off more times than necessary. These are more helpful with a low top shoe and probably not critical if you have a higher top boot.
Columbia Rain Jacket
This was my primary jacket on the AT. It is reasonably light as rain jackets go, and provides a small amount of insulation. It’s cheaper than most UL rain jackets you can get and slightly heavier and bulkier as a result, but I like this jacket and would use it again.
My experience having worked in the industry is that most major name brands will offer pretty comparable quality jackets within very similar price ranges ($150-400) with the trusted and expensive brands being Arcteryx, North Face, Patagonia, and Outdoor Research. Fjallraven
makes excellent gear but you’ll pay twice what you should just for the name (expect $500+). I’ve always viewed Columbia as a tier down in quality and price. A good option, not the best, and more affordable. Marmot is similar to that.
Tip: look for welded seams over taped seams whenever you can. Both will advertise waterproof, but welded seam jackets offer better durability and reliability over taped seams. Welded seams will usually cost more though, so just consider your options as a good taped jacket can be just as effective in the short term
Patagonia Nano Puff Jacket - 9.5oz - $170
Very light, very packable, very warm. I had this jacket before the JMT but it isn’t cheap for what it is at $170. Still, this jacket has amazing warmth to weight ratio and is a total winner. I’ve used it many times on and off the trail and it has never failed me, but I question how well it would retain heat if it were wet, and this weave is apt to absorb water. I’d wear a rain jacket over top of it in wet and cold conditions.
In today’s market I’m sure there are plenty of competitor micropuff jackets that likely meet the same standards (as described in the above section on my rain jacket), though I don’t have personal experience with anything comparable.
Black Diamond Light Weight WoolTech Gloves - 1oz
A midweight glove that did a lot for comfort and convenience in the morning when it was cold or there was dew on things. Good weather kept me from needing these too much, but I could see using them on many of the high mountain passes from Muir Pass to Mt. Whitney. I have some questions about this specific glove’s stitch quality; the tips of my index fingers failed at the stitch line on both hands. To be fair, I’d had them for years of running before the trip but have never done anything untoward to them.
My experience is also that all gloves which claim to be “capacitive” or work with touch screens universally fail to do so. Invest if you want to give it a chance, but I wouldn’t spend extra for a glove advertising capacitive finger tips again. I’ve owned two pairs that claim this feature and neither worked even from Day 1.
2x Stance Run sock Crew length

Light, synthetic material. Washes easily, dries easily, comfortable all day. Darn tough and Smartwool thin socks would also suffice, but I’ll remain partial to Stance due to hundred of miles run in them without signs of wear, and more importantly, exceptional style points. Stance makes the coolest looking socks I’ve ever seen.
One pair to wear. One to be washed, dried, on reserve for emergency warmth
Crew length was important to protection from debris
Moisture wicking fabrics that dry easily were really important and made getting socks dry really easy– took less than a day of hiking in the sun
I find all these brands to be overpriced even though I acknowledge them as industry leaders. You can get reliable, good quality socks in some running store brands, so long as they are using polyester and not cotton! Wool often steals the limelight for being warm when wet, but it’s also hard to get dry, so I lean towards the newer synthetic materials or a blend of wool with synthetic.
2x Light tech T-shirt, one in light color and one in black
Good to have an extra shirt in case you get wet and cold. Chose a light color for hot sun and a dark color for cold sun (black will keep you warmer in the sun). This isn’t a joke– if I was hot, just switching to my fluorescent green Orange Mud shirt would feel equivalent to a 5-10 degree temperature reduction.
1x Under Armor running leggings
Warm layer worn to bed every night, sometimes for the first hour of walking if it was really cold out. These were an obvious choice as someone with a running background in cold temps. Some hikers will choose a baggier alternative, but in my experience you can get a thinner, lighter pant leg to be just as warm if it is form fitting, and thus holds heat close to the body.
2x synthetic shorts
Probably only needed one pair in all honesty, but good to have a backup to wear while washing/drying the other pair. I’d leave the spare at home on a true ultralight trip, but again, use moisture-wicking tech materials here to avoid chafing or cold.
2x tech underwear
Tech material is essential choice- dries easy, cleans easy, lower risk of chafing
Important to test in advance for risk of chafing issues
Beanie
I have no attachment to my specific beanie. It was heavy thick cotton which would not have been the best choice in wetter conditions. Still, I wore it to bed every night and while packing camp in the morning. Keeping the head warm is known to be very important to full body warmth– the beanie is worthwhile even in less than frigid conditions
Buff/ neck gaiter
Backup for cold and high wind conditions
1 Nike tech long sleeve
I wore this to bed as a midlayer on especially cold nights only. It’s generally smart to bring a long sleeve, and this one was lightish and a darker color, but it’s the sort of item you leave at home if you’re trying very hard to cut weight or go ultralight.
Similar to jackets, I believe you can get equal grade options for the same or less from Under Armor, Adidas, Brooks, Rabbit, and more. On a budget consider Russell Athletic as I have been impressed by some of this budget brand’s offering. One of my pairs of shorts for this trip are Russell, and I’ve had them for 7 years. They came on the AT with me as well.
1 Adidas sweatpants
These are bulky but warm, and still made with synthetic materials. I’ve owned these for years and they have always been the best sweatpant ever. Warm, easy to take on and off over shoes, and have shown no signs of age through years of hard use. Can you find lighter options to accomplish the same thing? Absolutely, but these are so comfortable compared to most of those alternatives I was willing to carry them, heavy as they may be.
Columbia wide brim sun hat - $30
A sun hat was incredibly valuable. Wore it all day, every day as protection from a hot and harsh California sun. Some will choose the neck flap over the wide brim but I preferred the wide brim’s ventilation. You might not need a hat if you’re cutting weight, but there are really lightweight hats like this one out there, so it was worth it in my mind.
Safety
Aquamira Water Treatment
Smart to take tablets as a backup for the filter, but many tablet brands are of equal reliability
iPhone - 4 oz
Garmin inReach Mini satellite phone - 3.5 oz, $400 + subscription

Satellite phones are expensive, but they are the only reliable communication in these remote areas. They are essential in an emergency backcountry situation, and also proved convenient in the face of some other unexpected circumstances on the trail. The inReach Mini is among the most convenient size and weight you’ll find for backpacking.
Face mask for COVID and/or smoky conditions
Tom Harrison Maps John Muir Trail map pack
These were the most important tool for planning the next day’s mileage each evening. They contain all the standard landmark and topographic information, but one useful feature is treeline shading. In the California sun, stopping under trees was vastly preferable whenever possible, especially for setting camp.

Guthook Guides Mobile App with JMT download (since rebranded as FarOut)
This app came into play with every question. Where is the next water we could filter from? How far to nearest campsite? How much distance left to our end of day goal?
I won’t argue Guthook is the best app for this or that you should use it, but I would recommend a JMT download to Guthook, Gaia GPS, OnX Backcountry, CalTopo, or some similar backcountry mapping app.


Compass
First Aid Materials
Blister treatment, ace bandage, NSAIDs, acetaminophen, after bite, antibiotic ointment, gauze pads, tweezers, lots of bandaids, etc.. This stuff doesn’t weigh much and can be the difference between an inconvenience and a trip-ender.
Accessories
Osprey Aether 70 backpack - 4lb 15oz.

I rolled this pack over from the Appalachian Trail. It was a great pack for the job just as it was on the AT. At 70L this is a big pack, but I generally believe it is better to have more space and not need it than need space and not have it. The only time this pack felt full was at the start when we were carrying seven days of food to get us to Muir Trail Ranch. When it wasn’t full, the pack cinched up really well so things weren’t bouncing around while I was walking. Plenty of people will hike the JMT with a smaller pack, but it’ll be largely dependent on how you plan to carry the very bulky bear canister.
New packs offer better back ventilation, but the back of this pack did not bother me. The JMT has dry air so moisture doesn’t collect as easily as in other environments. Now 650+ miles deep this pack has started to show its age with some tearing seams. The Aether 70 was in the sweet spot of price and weight when I bought it in 2015, and has not fallen behind modern technology very much. The newer versions of this pack are now a couple of ounces lighter.
The pack itself is so crucial to your success that I would never recommend cutting corners here. Osprey, Gregory, and Deuter packs are the gold standard for cost:weight. Fjallraven makes burlier packs that are a bit heavier and much more expensive. REI and similar store brand packs will look appealing with the affordable price tag, but they have a record of uncomfortable straps, tearing fabric, and cushioning that presses out very fast. Spend the extra for a Gregory, Osprey, or Deuter. The only real difference between these three will be how they fit you as each brand has a slightly different fit. Also, get fit by a backpacking specialist to choose the right frame size for you.
Black Diamond SPOT Headlamp - 3.25oz w/ batteries, $50

The BD SPOT is a 300 lumen headlamp that has been through almost everything with me. I have had it for 7 years and have never had any major issue with it. It has adjustable dimming, a super-bright setting, flashing, red light, and probably other things I don’t remember. I’m simple when it comes to this and have only ever used the adjustable dimming feature to conserve battery.
If you want to save weight on your headlamp, you’ll lose brightness. The brighter you want it to be, generally the heavier they get. The SPOT is a middle-ground headlamp. Petzl makes very comparable headlamps, and Fenix makes some of the heaviest but brightest lights on the market.
One final note is that rechargeable headlamps have gained steam in the last few years. They will cost a little more than the battery-replacement counterparts but you’ll save money in the long run by not replacing batteries as much. Not to mention the reduced carbon footprint of a rechargeable lamp with comparison to the standard variety.
Spare AAA batteries
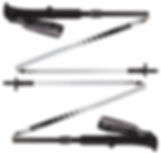
Black Diamond Distance Carbon Z Trekking Poles - 15.7oz, $80 at REI Garage Sale
A really light and easy to use pole with a comfortable grip and wrist leash. These ones are aluminum and lighter carbon fiber options do exist but these hit the sweet spot on cost and weight.
A lot of sunscreen
Applied at least once per day in the morning, and again after swimming. I prefer the mineral sunscreen for its robust protection and due to some recent bad press for avobenzone-containing sunscreens.
DEET 100 Bug spray
Bug headnet
Never used, but might have mattered on wetter year or earlier in the season
TP supply
Simple, unnecessary but convenient. Leaves and branches could be used if needed
Hand sanitizer
Nice to be able to get your hands clean once in awhile, especially when cooking
Toothbrush
Travel size toothpaste (<1oz)
Portable Battery Charger
Heavy but important backup. A variety of sizes can be found for your specific power needs. I don’t consider any brand or model preferable to others based on my experience with them.
Pack cover
Came with the pack and was sufficient for our purposes. Probably not the most water resistant option available though.
Extra Ziploc bags
To pack clothes dry, bathroom supplies, trash from food containers
Sunglasses
Very sunny and bright trail. Helpful for comfort and vista admiring
Not quite a requirement, but I’d strongly recommend them to all
Journal Book/Writing utensil
Read the final article in the JMT Series here for a review of some of our notes from the trail.
Did you find this article helpful or interesting? For more from Treeline Endurance, sign up below to receive updates on the latest posts. You can also follow on Twitter, Instagram, and Facebook.

